Thursday, May 6, 2010

Ahh paint... ( or, Please excuse the long rambling post...)


After that primer had dried I was left with a very irregular surface, more so where the stripping was done. I investigated about a dozen different brands of fairing compounds and found none of them cheap. I ended up with regular “Bondo” from NAPA auto. As anyone with a boat can tell you, adding the 'marine' designation opens up a whole new world of cost. Occasionally it's justifiable. It required a couple of coats to get the surface to a workable state but the end result is a pretty even surface.
Following this was more primer and more sanding, then, more primer and more sanding, then a little more primer and just a bit more sanding to end up with...wallah...a surface that actually looks good!

A note on sanding... The products will all tell you to sand with progressively finer paper ending somewhere in the 200's or 300's. Follow their instructions. If you decide to skip a step you will end up with the sanding marks in your work. If you like that, well OK then. If you don't you will need to fill it with something that requires...SANDING. Don't skip the grades.

The final coat of primer went on beautifully and the end product is very satisfying. I found myself muttering “I love paint” all the while applying it because paint has this trans formative quality unlike any other product.

Also during the past couple of weeks I started to touch up the handrails for the cabin top in preparation for their re-installation. The various caulks left behind on their bases were reluctant to come off to the point where I ended up scraping them right off and sanding them down to bare wood. One of them splintered up badly and needed to be rebuilt. Epoxy and and some additional work has returned it to a usable state. I plan on lightly bedding these when I put them back on to avoid destroying them when they come off for the cabin top work in a year or two.

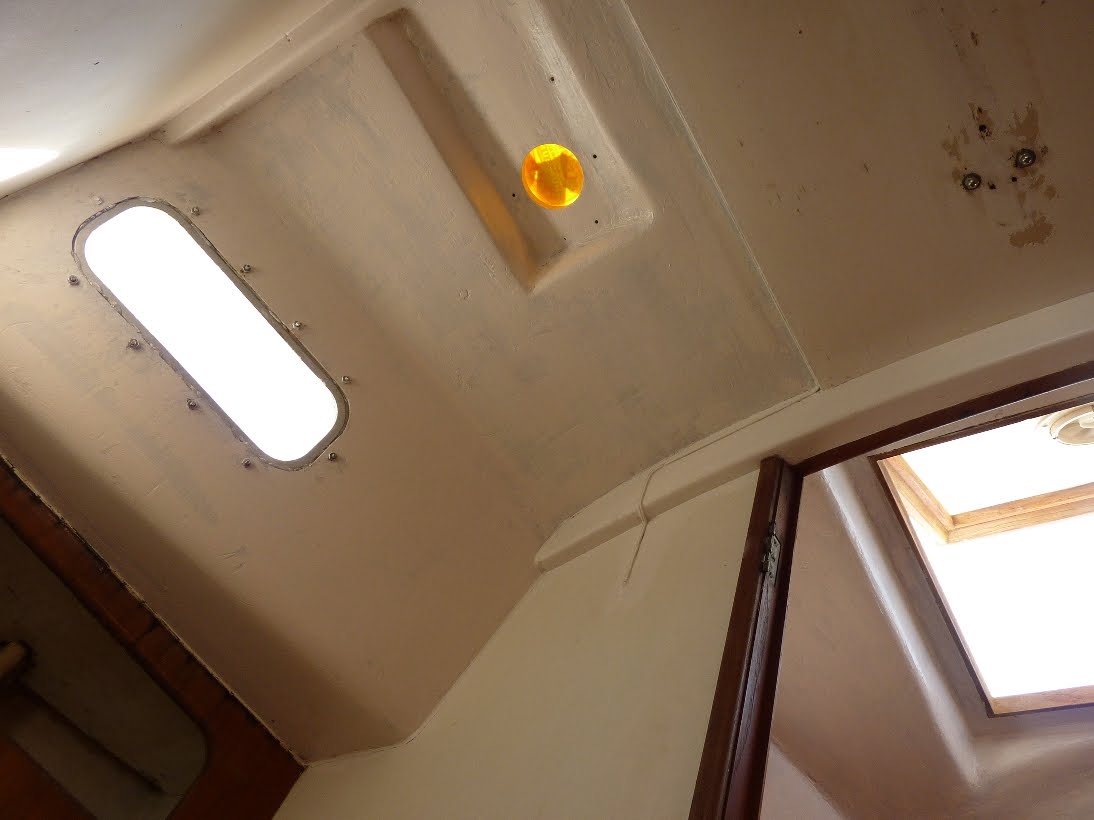
I also sanded and primed the top of the cabin where I had filled the previous mounting holes. Here again , even though it's only primer, paint makes a world of difference.

And then there is the toilet. Astute readers will notice this as the first mention of an item contained on the “to do” list composed at the outset of the project. This is true, but none of the installation can occur until the prep work is done in the head area so that led to the scraping , sanding etc... Since the boat was previously used in waters where you could discharge over board, there was only a small buffer tank on the boat. Its placement made the door completely inoperative and as a result, it went directly into the dumpster.

For a replacement I chose a Jabsco marine toilet and Moeller holding tank. The hoses that connect these two is an area where the 'Marine' designation really does make a difference. Because of the placement of the tank, the hose that connects the toilet and the tank has the possibility of having black water sitting in it. A super duper ultra deluxe hose was put in here to avoid the possibility of odors seeping out. I have chosen the same grade of hose for the fresh water intake to keep the install uniform and tidy.

When the top of the base was removed before the painting started, I noticed that the water that had been dripping down from the one leak in the ceiling had accumulated in the box designed to hold the toilet level. There was a considerable amount in there but surprisingly there was no damage.
The top is being refinished now and will be installed with the toilet.


The other surprising thing that showed up during this phase of the work was the fact that there was no way for the water that accumulated in the chain locker to find its way into the bilge, I had to drill a hole in the bulkhead in the front of the V berth to let the water I used to wash it down escape. With this done I watched the water drain out of the chain locker but it never made it to the bilge. Hmmmm. The only place it could be (other than outside on the ground) was under the V berth; a place currently inaccessible. Not for long. Out came the jig saw and soon I was looking at 5” of missing water. Another hole finished the job of draining the locker.

Friday, April 23, 2010

Stripping follow up...


The next day’s thicker application came with little success but created a lot of extra work. I came back and applied a coat to the cabin ceiling on the port side only and let it sit for about 12 hours. When I started to scrape off the remaining finish I noticed that it was coming with the fairing filler that was used to make the cabin ceiling presentable. Basically the stripper had softened this up enough so that a putty knife would dig right in. However there were parts where the paint refused to budge making the whole job a big mess. I cleaned up as much as possible and then washed down the surfaces with water to remove the residue left from the stripper.
At this point I figured that I would try to scrape the port side and see if the outcome was any better. The answer: definitely. After about an hour of difficult scraping I had removed the loose paint and this included the head ceiling as well. I did not take off as much material and although I left some of the old finish behind, the result was a much smoother base on which to start the repairs. You can easily see the difference in the photos.
From here I applied a coat of Interlux Pre-Coat. And called it quits for the weekend.

Monday, April 5, 2010

Day three...


Today I tried some paint stripper on the ceiling of the vee berth. I figured that lying on my back and scraping would really be a terrible job and anything that would ease that pain is worth a shot. A quick web search led me to a water based stripper named Aqua Strip that people seemed to be having good luck with. I swung by West Marine and was soon painting the paste on the ceiling of the cabin. It turns out that putting it on with a paint brush is not the best way to go as I would soon find out.

While I was waiting for this to work its magic I turned my attention to the holes in the cabin top. All of them seemed to work out OK and none pushed past the tape into the cabin. I sanded them flush and applied a coat of epoxy with a faring filler today that should make it a bit easier to sand, although that is a relative term as sanding any WEST SYSTEM product is not easy.

That finished I went back to scrape some of the stripper off and found that there either wasn't enough time allowed or enough material applied. I decided to call it quits for the day and try another thicker application tomorrow.

Day one...

Weather broke in grand style this year and it was 80 degrees on April 3rd. After emptying the boat of all the things I could carry off (boats hold an unbelievable amount of stuff) I got to work. By this time I had pared the list down to a few key jobs; address the old diesel in the tank and change the lines and filters, put in a fresh water system with a new toilet and associated plumbing, change the cracked rigging and paint the ceiling inside the cabin.

I started the day by doing none of these. There were leaks in the cabin top around one of the outside grab rails and I figured that would be a good place to start. I pulled the grab rail off and started to drill out the holes to see if the core would be rotten between the skins. I got lucky; while the core was wet, it was not rotten and after drying out would be OK.

Encouraged by this, I removed all the cabin top hardware and drilled more holes in suspect areas. Again the findings were good. With the exception of a few spots, the core was in great shape and would not require rebuilding. Drilling and filling these holes took up the greater part of the first two days.

Saturday, April 3, 2010

The plan

Lets see... Needed: rig, diesel check and tank, fuel hoses, fresh water, toilet and holding tank, paint paint paint, and of course, varnish.

In starting this years list I drew the line at at the rub rail. All things below were off limits. Needless to say that leaves a pile of available work. I started writing it into Excel and split it into the areas of work. From here I assigned hours and weather required for the work. Soon I came to realize that I had about 200+ hours of work on the list. This was not going to work out.

The last boat I brought back from the brink was done during a time when I didn't have a family or even furniture in my house. It seemed perfectly reasonable to make the living room into the teak refinishing room. It also was not a problem to make my once clean and clutter free car into a rolling tool box filled with epoxy, grinders, coveralls and the like. Things are happily different now and I didn't buy the boat to get away from my family, quite the opposite is true, and this is where the realization set in that I couldn't get it all done and still have time to sail this year. Now I know how how those projects just keep getting put off 'just one more season'.

An introduction


I often read the articles in sailing magazines and wondered why someone who had a boat, wrote articles for magazines, and seemed to have owned the boat for many years, would only now be getting around to rebedding deck hardware or replacing the electrical panel or whatever they happened to be writing about. I figured out why this weekend.

I bought this 1968 Hinterhoeller Redwing 30 in Connecticut this spring from Central Connecticut Marine Sales. The brokers name was Gary Torello and he was great to work with (if you need a broker, I can't recommend him enough). I had always admired the lines of these boats and found this on Yachtworld and decided to take the ride form western NY to Ct and have a look. The outcome is obvious.

The boat needs all things cosmetic and after I purchased it there were many weeks between the "I'll take it" and when it showed up here. During that time, I devised a plan to do only the necessary things to get it sailing this year and then do the decks next year, hull after that...etc. That sound bit of thinking went right out the window as soon as it arrived in my marina.